1. Preliminary Assessment & Planning
Site & Borehole Data Collection
- Verify borehole depth, diameter (casing size), and screened interval.
- Test for static water level (SWL) and dynamic water level (i.e. drawdown under pumping).
- Do a pump test / yield test to determine sustainable yield (L/hr or m³/day).
- Assess water quality (sand content, pH, dissolved solids, iron, etc.) to choose materials that resist corrosion / abrasion.
Pump Selection
- Choose a pump whose discharge (flow) is slightly less than or equal to sustainable yield (to avoid over-pumping).
- Ensure the head (vertical lift + friction losses) is within the pump’s capacity.
- Consider motor type (single-phase, three-phase, voltage, power) and cable requirements.
- Select suitable materials (stainless steel, plastic, cast iron) depending on water quality (e.g. high iron or sand content demands more robust materials).
Access & Civil Setup
- Provide a secure platform or wellhead structure.
- Prepare a casing head / borehole cap / seal to prevent contamination from surface water.
- Plan for power supply, control panel / starter, cable routing and protection.
2. Components & Accessories Checklist
Before installation, ensure you have:
- Submersible pump + motor assembly
- Drop pipe (stainless, HDPE, PVC, or galvanized, depending on design)
- Cable (drop cable) sized appropriately
- Safety / support rope or steel wire
- Non-Return Valve (NRV) / Check valve
- Gate valve / control valve
- Adapter / coupling flanges
- Torque arrestor or bracket
- Cable clamps / waterproof tape
- Electrical control box, starter, protection devices
- Borehole cap, casing seals, sanitary cover
- Tools: wrenches, torque tools, clamps, lifting gear (chain hoist, tripod)
- Pressure gauge, flow meter, air line for leveling / testing
3. Assembly Before Lowering
- Couple motor and pump: Align splines correctly, tighten bolts gradually and evenly (cross-pattern).
- Attach drop pipe and safety rope / cable: Securely tie or clamp the electrical cable to the drop pipe at intervals (2–3 m) so the cable doesn’t hang freely.
- Install NRV / check valve near the top (if required) to prevent backflow.
- Ensure smooth edges on the bore casing opening so as not to damage cable or pump during lowering.
- Test rotation (for three-phase motors): briefly energize to confirm correct rotation direction (anti-clockwise when viewed from discharge end).
- Pre-test pump on surface (optional): Place pump in a tank of water, power up briefly to see if it runs smoothly and draws the correct current.
4. Lowering the Pump into the Borehole
- Lower slowly and vertically; avoid banging or hitting the sides.
- Use the safety rope / wire to bear most of the weight, not the cable itself.
- At intervals, secure the cable to the drop pipe using waterproof tape or clamps (every ~2–3 m).
- Ensure the pump is installed above the bottom (sump) by 1–3 m, not resting on the borehole bottom (to allow cooling and prevent sediment).
- Maintain spacing so the pump intake remains submerged even under drawdown.
- When fully lowered, fix the top of the pipe and cable at the borehole head (use clamps, supports), and seal the borehead.
5. Surface & Electrical Installation
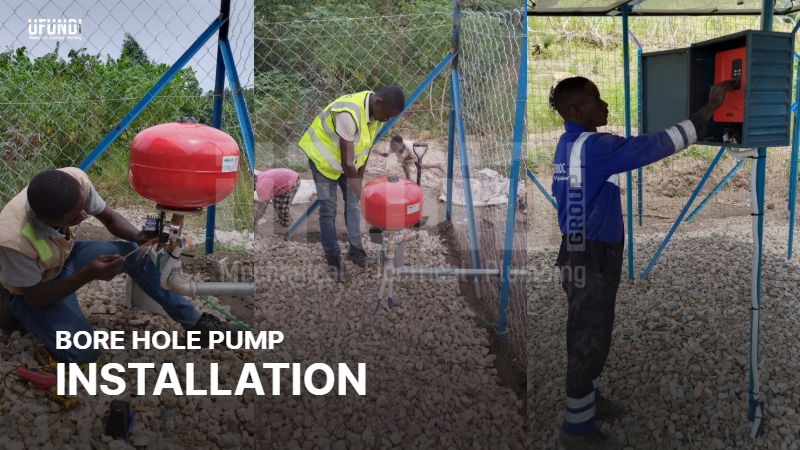
- Install control box / starter and protection devices (overload, phase failure, etc.).
- Connect the drop cable to the control circuits, ensuring proper insulation and waterproofing.
- Ground / earth properly (do not rely on metal drop pipe as earth).
- Install gate valve, pressure gauge, and discharge piping from bore head to storage or distribution.
- Seal the borehole casing head with a sanitary cover to prevent debris or contamination.
6. First Start & Commissioning
- Start with the gate valve mostly closed (low flow) to avoid sudden surges or sand intake.
- Gradually open the valve, observing discharge and checking for sand or turbidity.
- Collect some discharge water in a container and let suspended solids settle; if heavy sand, stop and allow the borehole to stabilize.
- Monitor current draw and pressure against expected values.
- Operate for an initial test run (30 minutes or more) and check that the water level doesn’t drop so far as to expose the pump intake.
- Record all readings (voltage, current, flow, pressure) as baseline for future maintenance.
7. Maintenance & Monitoring
- Regularly log flow, pressure, power, water levels.
- Periodically raise and inspect pump / cable (if design allows) for wear.
- Monitor for sand, corrosion, motor heating, vibration.
- Replace NRVs and seals as needed.
- Clean the borehole (redevelopment) if yield drops significantly.
8. Common Pitfalls & Tips (From Best Practice)
- Over-pumping beyond yield damages both aquifer and pump.
- Running dry / underflow can overheat / damage motor bearings.
- Poor cable support leads to cable tension or abrasion damage.
- Bad assembly (misalignment, improper coupling) causes vibration and early failure.
- Sand / sediment ingress is one of the most common causes of failure — screening, slow startup, and periodic borehole cleaning are crucial.
- Ensure good sealing and borehole head protection to prevent surface contamination.